Ubuntu 20.04+
For ease of installation, OpenLane uses Docker images.
These images include OpenLane’s applications, binaries as well as all the required dependencies.
All of the flow tools are encapsulated inside the container image.
Only Ubuntu 20.04 and above are supported.
Installation of required packages
Update packages database and upgrade the packages to avoid version mismatches then install required packages.
sudo apt-get update
sudo apt-get upgrade
sudo apt install -y build-essential python3 python3-venv make git
Docker Installation
Next, install Docker. Follow the instructions provided in the Docker documentation here as the steps provided below might be outdated.
Warning
The steps below might become outdated, it is encouraged to follow the link to the official Docker documentation.
# Remove old installations
sudo apt-get remove docker docker-engine docker.io containerd runc
# Installation of requirements
sudo apt-get update
sudo apt-get install \
   ca-certificates \
   curl \
   gnupg \
   lsb-release
# Add the keyrings of docker
sudo mkdir -p /etc/apt/keyrings
curl -fsSL https://download.docker.com/linux/ubuntu/gpg | sudo gpg --dearmor -o /etc/apt/keyrings/docker.gpg
# Add the package repository
echo \
   "deb [arch=$(dpkg --print-architecture) signed-by=/etc/apt/keyrings/docker.gpg] https://download.docker.com/linux/ubuntu \
   $(lsb_release -cs) stable" | sudo tee /etc/apt/sources.list.d/docker.list > /dev/null
# Update the package repository
sudo apt-get update

# Install Docker
sudo apt-get install docker-ce docker-ce-cli containerd.io docker-compose-plugin

# Check for installation
sudo docker run hello-world
A successful installation of Docker would have this output:
Hello from Docker!
This message shows that your installation appears to be working correctly.

To generate this message, Docker took the following steps:
1. The Docker client contacted the Docker daemon.
2. The Docker daemon pulled the "hello-world" image from the Docker Hub. (amd64)
3. The Docker daemon created a new container from that image which runs the executable that produces the output you are currently reading.
4. The Docker daemon streamed that output to the Docker client, which sent it to your terminal.

To try something more ambitious, you can run an Ubuntu container with:
$ docker run -it ubuntu bash

Share images, automate workflows, and more with a free Docker ID:
https://hub.docker.com/

For more examples and ideas, visit:
https://docs.docker.com/get-started/
Making Docker available without root (Linux)
Warning
The steps below might become outdated. It is recommended to follow the link to the official Docker documentation here: instructions here.
Important
This is a mandatory step. Without this, most OpenLane scripts will error out with permission issues. A majority of installation issues from users come from people skipping this so, once again, DO NOT SKIP!
sudo groupadd docker
sudo usermod -aG docker $USER
sudo reboot # REBOOT!
You must restart your operating system for the group permissions to apply.
Checking the Docker Installation
After that, you can run Docker Hello World without root. To test it use the following command:
# After reboot
docker run hello-world
You will get a little happy message of Hello world, once again, but this time without root.
Hello from Docker!
This message shows that your installation appears to be working correctly.

To generate this message, Docker took the following steps:
1. The Docker client contacted the Docker daemon.
2. The Docker daemon pulled the "hello-world" image from the Docker Hub.
   (amd64)
3. The Docker daemon created a new container from that image which runs the
   executable that produces the output you are currently reading.
4. The Docker daemon streamed that output to the Docker client, which sent it
   to your terminal.

To try something more ambitious, you can run an Ubuntu container with:
$ docker run -it ubuntu bash

Share images, automate workflows, and more with a free Docker ID:
https://hub.docker.com/

For more examples and ideas, visit:
https://docs.docker.com/get-started/
Troubleshooting docker installation issues [Linux/Ubuntu only]
If you get Docker permission error when running any Docker images, then likely, you forgot to follow the steps to make Docker available without root or you need to restart your Operating System.
OpenLane> docker run hello-world
docker: Got permission denied while trying to connect to the Docker daemon socket at unix:///var/run/docker.sock: Post "http://%2Fvar%2Frun%2Fdocker.sock/v1.24/containers/create": dial unix /var/run/docker.sock: connect: permission denied.
See 'docker run --help'.
OpenLane>
Checking Installation Requirements
In order to check the installation, you can use the following commands:
git --version
docker --version
python3 --version
python3 -m pip --version
make --version
python3 -m venv -h
Successful output will look like this:
git --version
docker --version
python3 --version
python3 -m pip --version
make --version
python3 -m venv -h
git version 2.36.1
Docker version 20.10.16, build aa7e414fdc
Python 3.10.5
pip 21.0 from /usr/lib/python3.10/site-packages/pip (python 3.10)
GNU Make 4.3
Built for x86_64-pc-linux-gnu
Copyright (C) 1988-2020 Free Software Foundation, Inc.
License GPLv3+: GNU GPL version 3 or later <http://gnu.org/licenses/gpl.html>
This is free software: you are free to change and redistribute it.
There is NO WARRANTY, to the extent permitted by law.
usage: venv [-h] [--system-site-packages] [--symlinks | --copies] [--clear]
            [--upgrade] [--without-pip] [--prompt PROMPT] [--upgrade-deps]
            ENV_DIR [ENV_DIR ...]

Creates virtual Python environments in one or more target directories.
...
Once an environment has been created, you may wish to activate it, e.g. by
sourcing an activate script in its bin directory.
Download and Install OpenLane
Download OpenLane from GitHub:
git clone --depth 1 https://github.com/The-OpenROAD-Project/OpenLane.git
cd OpenLane/
make
make test
These steps will download and build OpenLane and sky130 PDK. Finally, it will run a ~5 minute test that verifies that the flow and the PDK were properly installed. If you are planning to use another PDK, then you need to follow the PDK installation guide for that specific PDK.
Successful test will output the following line:
Basic test passed
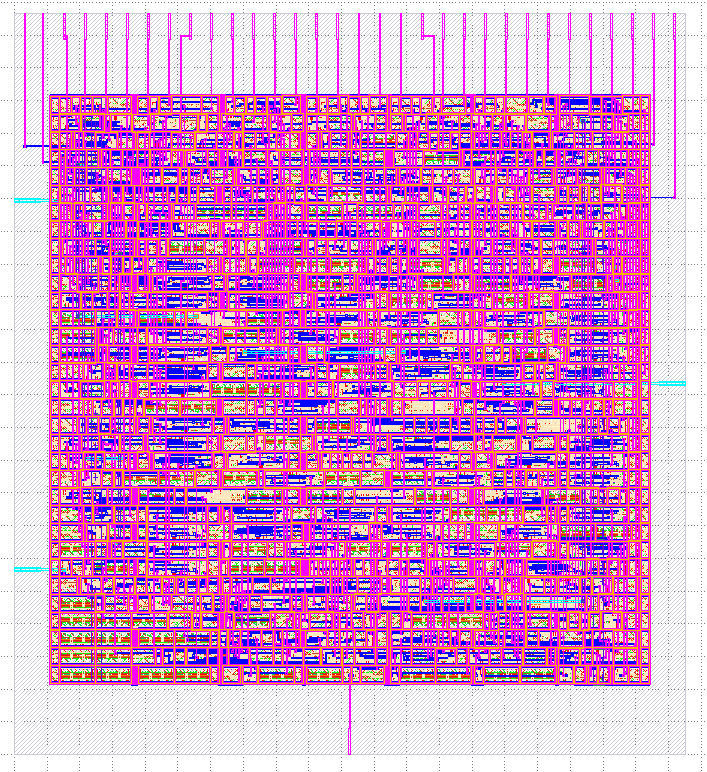
Optional: Viewing Test Design Outputs
Open the final layout using KLayout. This will open the window of KLayout in editing mode -e with sky130 technology.
# Enter a Docker session:
make mount

# Open the spm.gds using KLayout with sky130 PDK
klayout -e -nn $PDK_ROOT/sky130A/libs.tech/klayout/tech/sky130A.lyt \
   -l $PDK_ROOT/sky130A/libs.tech/klayout/tech/sky130A.lyp \
   ./designs/spm/runs/openlane_test/results/final/gds/spm.gds

# Leave the Docker
exit